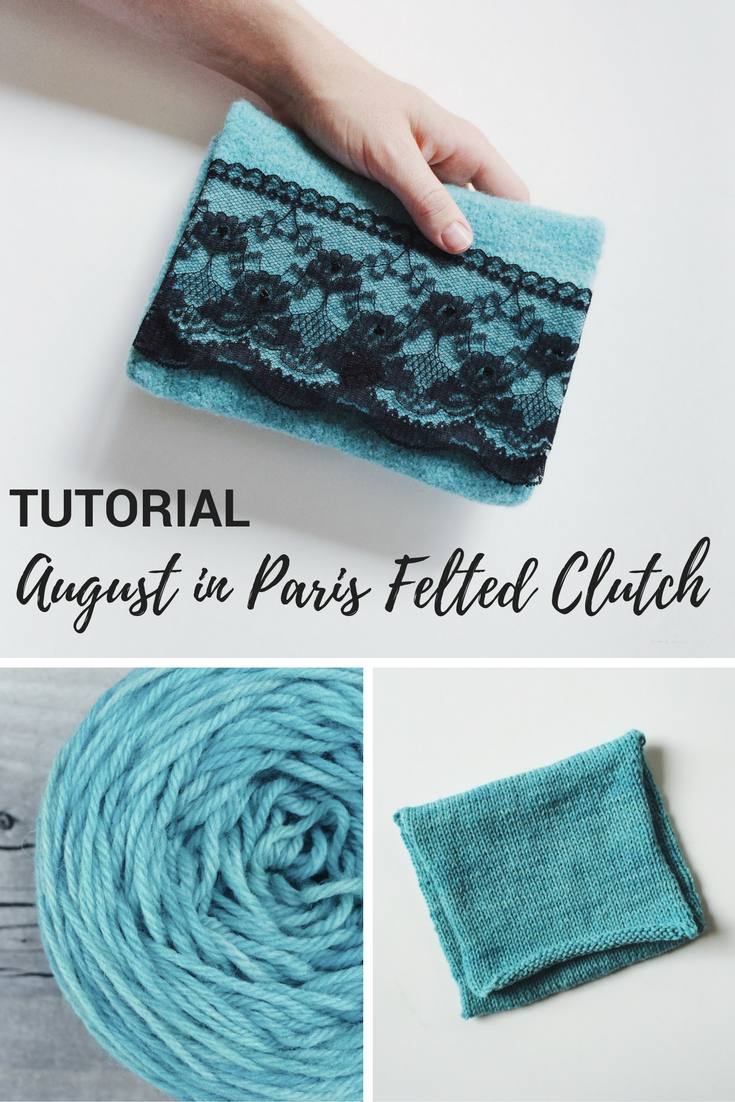
August in Paris Felted Clutch

I have to say that superwash wool is dear to my heart, but non-superwash has its place as well. For the August Dye Box, we worked with a 100g hank of non-superwash 100% wool in a Caribbean Dye, DK weight. This aqua blue dye extract, coupled with the hefty 246 yards, had me thinking...
Soon I settled on a felted clutch idea. I had plenty of yarn leftover after making this, so really this could have been made in to a bigger clutch than what I did.
I'm calling this clutch the "August in Paris Felted Clutch." No, I did not travel to Paris in August, nor have I ever traveled outside North America pretty much. But I picked Paris lining fabric to match the whimsical lace on the outside, and so you have it.
I didn't keep exact notes or measurements - this is all roughly recorded, but I hope you can find inspiration to create your own, follow your own rules, and really be the driver of your own project.

STEP ONE: Dye your yarn from your August Box - carefully I might add. Felting is real guys, and we don't want it to happen too early, so be gentle, raise the cooking temp gradually, and barely barely touch the yarn while it's cooking. Let it dry, and get that hank into a cake (or ball, whichever put up you prefer).

STEP TWO: Knit your clutch (or crochet and see what happens!). I cast on 80 sts with the Magic Cast On by Judy Becker (commonly used for toe-up socks) on a i-can't-even-remember size needle. Probably about a 6mm circular, but the key is to use needle size a couple sizes bigger than what you'd normally use for the DK weight to aid in felting.
This was 40 sts on each needle, then knit in the round for desired length. Then I cast off one needle, and worked remaining sts back and forth for my clutch flap. Remember that felting SHRINKS, so make your clutch bigger than what you actually hope plan pray to have in the end.

STEP THREE: Felt! After you've completed your clutch, toss it in some hot water with some mild soap and let it soak for a good 20 minutes. Then its time to rub-a-dub-dub and agitate the heck outta that fiber. I used rubber gloves so my water could be HOT HOT HOT, and with the soapy suds and hot water, you get felting!
Rub it, twist it, dunk it, swish it, and repeat it! At first, it'll get bigger, and you'll think, this isn't working, Makenzie is _____. But, trust me, keep going! After it gets bigger, it'll get smaller, and then the magic happens. Keep doing this (adding more hot water if necessary) until you get the density you want. I wanted mine to be pretty thick, with not a lot of light coming through and barely any stitch definition. Rinse it in cold water to set the fiber, shape it, and let it dry until its dry!
STEP FOUR: You could stop here, or keep going like I did and bedazzle the heck outta your clutch. I went to the store and purchased interfacing (the stuff that make stuff stiff...you heard right), little bit o' lace, 381209852 black beads, of which I have 381209843 remaining, lining fabric, snap closure, and a some real good my-toddler-is-napping-it's-go-time time. Also have a needle and thread on hand. It's about to get real sewy up in here.
STEP FIVE: Gonna make this as clear as mud. Put your snap closure where you want it to go - just poke it through your felted clutch-fabric (1). Cut interfacing to fit inside your clutch (you could skip this step if stiff clutches aren't your thing). I doubled my interfacing on each side, because I'm a woman who needs structure in her life (2).
Cut your lining, leaving extra room for sewing (3). Fold over the top of both linings and sew each across (this makes a pretty edge for your lining) (4), then put right sides together and sew around three sides, making a pocket. This is the only part I used a machine for.

Put interfacing in clutch (5), lining in clutch (6), and this is where I carefully hand stitched the lining to the clutch (7), being sure to not go all the way through since I didn't want to see thread lines on the outside of the clutch. While your sewing the lining, the interfacing is just kind of hanging out, sandwiched between the felted yarn and lining fabric. Make sense?

Now your insides are all done (8)!
For the lace, I happen to get lace that had these really helpful designs that allowed me to hand stitch it to the clutch inconspicuously. I stitched the lace to the clutch across the top first, then before tacking on the bottom too, I went underneath the lace and added my three beads to each of the flower centers for added whimsical-ness. I also used some extra lace to hide my snap closure, which you could have seen through the lace. Then, tacked down the bottom, tacked down the sides, and voila - an August in Paris Felted Clutch!

Easy? Hard? Questions? Let me know!

1 comment
perdere peso in una settimana